Dann war meine Vermutung doch richtig !
( Hatte ja schon gesagt, daß sich mein Evo "knackiger" Schalten lies als die anderen 16V's die ich gefahren bin- kannst du dich erinnern Jesper ?)
Tja hätte man das vorher gewusst..ist aber denke ich nicht so tragisch!
Ist aber dennoch interessant zu sehen, das bei den Evo's doch mehr Sachen geändert wurden als man auf den ersten Blick meinen würde!
Bye
Maki
The Maki project
Moderator: Moderator
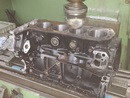
![]() von Bertin2002 » 20. Feb 2007, 02:06
von Bertin2002 » 20. Feb 2007, 02:06
vorallem weil man sie im EPC nicht findet!
Auf meinem Schaltbock steht aber auch "Evo" drauf, naja dann muss ich mir halt doch die unteren noch anfertigen lassen!
Will jemand 2 Sätze?
Gruß Bertin
Auf meinem Schaltbock steht aber auch "Evo" drauf, naja dann muss ich mir halt doch die unteren noch anfertigen lassen!
Will jemand 2 Sätze?
Gruß Bertin
-

Bertin2002 - maxi Ventiler

- Beiträge: 558
- Bilder: 1
- Registriert: 13. Sep 2005, 12:25
- Wohnort: Heidenheim
- Autos: 2.3-16, 2.5-16, Evo 1, Evo 2
![]() von Henger » 20. Feb 2007, 02:48
von Henger » 20. Feb 2007, 02:48
Bertin2002 hat geschrieben:vorallem weil man sie im EPC nicht findet!
Auf meinem Schaltbock steht aber auch "Evo" drauf, naja dann muss ich mir halt doch die unteren noch anfertigen lassen!
Will jemand 2 Sätze?
Gruß Bertin
Hi Bertin,
ich denke es ist null Problem die 2 Sätze los zu werden, es sind recht viele Anfragen über die Bestellung hinaus noch eingegangen
Interessant zu sehen wo weitere Detailunterschiede zu finden sind zwischen den Normalo und Evo Modellen
Gruß Fränk
Mitglied im 190E-16V Club e.V.

Team-Moderation des w201-16v.de Forum

"16V Fahren, ich kann jederzeit damit aufhören, ährlisch"
Wenn die letzte Tankstelle schließt, wird Euch auffallen,
daß Greenpeace nachts kein Bier verkauft.
Team-Moderation des w201-16v.de Forum
"16V Fahren, ich kann jederzeit damit aufhören, ährlisch"
Wenn die letzte Tankstelle schließt, wird Euch auffallen,
daß Greenpeace nachts kein Bier verkauft.
-

Henger - Administrator

- Beiträge: 11720
- Bilder: 26
- Registriert: 2. Sep 2005, 20:56
- Wohnort: Zweibrücken RH. Pfalz
- Autos: 2.5-16V EFI Bj.11/88 Erna
![]() von Bertin2002 » 20. Feb 2007, 10:50
von Bertin2002 » 20. Feb 2007, 10:50
wenn du von oben auf den Plastik Schaltbock draufschaust, lienks vom Schalthebel steht bei mir mit weißem Edding geschrieben " EVO "
Ich setz die Sätze dann mal in nen Verkaufsthread.
Gruß Bertin
Ich setz die Sätze dann mal in nen Verkaufsthread.
Gruß Bertin
-
Bertin2002 - maxi Ventiler
- Beiträge: 558
- Bilder: 1
- Registriert: 13. Sep 2005, 12:25
- Wohnort: Heidenheim
- Autos: 2.3-16, 2.5-16, Evo 1, Evo 2
![]() von db16v » 20. Feb 2007, 23:15
von db16v » 20. Feb 2007, 23:15
Bin mir da nicht so sicher.

MFG Thomas
Mitglied im 190E-16V Club e.V.
Team-Moderation des w201-16v.de Forum
Mein 2,5-16 Pick up
Projekt Rennwagen
Team-Moderation des w201-16v.de Forum
Mein 2,5-16 Pick up
Projekt Rennwagen
-
db16v - Moderator

- Beiträge: 2579
- Bilder: 9
- Registriert: 16. Sep 2005, 19:58
- Wohnort: Tecklenburg
- Autos: 190E Rundstrecke, 300E Pick Up, S203 C30, 2,5-16
![]() von LUDE » 20. Feb 2007, 23:18
von LUDE » 20. Feb 2007, 23:18
Ja ich frage mich wo denn die Bilder bleiben????????????????
Mitglied im 190E-16V Club e.V.
Team-Moderation des w201-16v.de Forum
Instagram: LUDE669
Team-Moderation des w201-16v.de Forum
Instagram: LUDE669
-

LUDE - Moderator
- Beiträge: 6714
- Bilder: 220
- Registriert: 12. Sep 2005, 20:58
- Wohnort: Ludwigshafen
- Autos: 190E 2.5-16 Kompressor Bj. 89, 190E 2.5-16 Sportevolution Bj.89, CLK 500 Bj.04, SLK 55 AMG Bj. 07
![]() von Racing » 2. Mär 2007, 20:59
von Racing » 2. Mär 2007, 20:59

Basic intercooler layout.For now only pieced together to make it fit like a glove,but since it did

Basic intake layout.
As can be seen i´ve opted to put the diffusor a little lower on Makis car as it most likely wont need fuel from ad on injectors in the trumpets(IOW exceed 500PS)
This gains clearance.

...and just for the sake of it an action picture..
- Racing
- maxi Ventiler
- Beiträge: 547
- Registriert: 10. Okt 2005, 12:12
- Wohnort: Göteborg
![]() von Racing » 2. Mär 2007, 21:08
von Racing » 2. Mär 2007, 21:08
Btw.
As Maki asked for a "stock" look of things...
Maki.
Current thinking goes along the lines of beadblasting the intake and then paint it with a clearcoat.
What do you think?
Beadblasting the aluminium and putting on a cleacoat will make it possible to still see the beutiful welds,and the beadblasting will make for a unison surface finish that´s sort of dull underneath the clearcoat.
Couple that with the black rubber couplings between the OEM intake base and some stainless steel worm clamps....
Sound like we could make that work?
- Racing
- maxi Ventiler
- Beiträge: 547
- Registriert: 10. Okt 2005, 12:12
- Wohnort: Göteborg
![]() von Maki » 2. Mär 2007, 21:55
von Maki » 2. Mär 2007, 21:55
Jesper as just arranged  - let the Bling-Bling for the others !
We'll go with the "dull" suface with clearcoat !
I think that fits more to the rest of my car end engine
Bye
Maki
We'll go with the "dull" suface with clearcoat !
I think that fits more to the rest of my car end engine
Bye
Maki
-

Maki - hyper-ventilator

- Beiträge: 2157
- Bilder: 0
- Registriert: 9. Sep 2005, 07:36
- Wohnort: Wuppertal
- Autos: Evo1
![]() von Racing » 3. Mär 2007, 19:38
von Racing » 3. Mär 2007, 19:38

Intake layout from above.As can be seen linearity is adhered to.

Intake from the front.Reason we keep a part of it "open" still is that it´s easier to clean it out from all the debris.Again linearity can be seen,as can the basic throttle body install.

This is the throttle wire bracket.In essence bolted directly to the main plenum-which we get away with as the plenum is from 3mm sheet.
Raised above the plenum via two simple "shims" made in the lathe of 12mm.Bolts are M6,and will be replaced by allen(insex) ones mainly for looks.

Lower plenum bracket.This bolts via the two aluminium weld bungs at the bottom of the plenum via a "V" shaped bracket to the OEM motormount on the drivers side.Install is via two M8 bolts to the plenum,and one M10 bolt at the motor mount.
- Racing
- maxi Ventiler
- Beiträge: 547
- Registriert: 10. Okt 2005, 12:12
- Wohnort: Göteborg
![]() von db16v » 3. Mär 2007, 19:49
von db16v » 3. Mär 2007, 19:49
 Ich bin begeistert von dem Umbau.
Will auch haben.
MFG Thomas
Mitglied im 190E-16V Club e.V.
Team-Moderation des w201-16v.de Forum
Mein 2,5-16 Pick up
Projekt Rennwagen
Team-Moderation des w201-16v.de Forum
Mein 2,5-16 Pick up
Projekt Rennwagen
-
db16v - Moderator
- Beiträge: 2579
- Bilder: 9
- Registriert: 16. Sep 2005, 19:58
- Wohnort: Tecklenburg
- Autos: 190E Rundstrecke, 300E Pick Up, S203 C30, 2,5-16
![]() von Racing » 5. Mär 2007, 23:27
von Racing » 5. Mär 2007, 23:27

Basic throttle body install.
As can be seen the axle for the TPS is to short to do any good in our application..so..i elongate it a bit

Further,various now obsolete vaccum ports are tapped and blocked off.Setscrews are installed with full hardening Loctite.

After elongating the throttle axle the TPS from Haltech fits like a glove.Clearance for the servolenkung behalter is close to say the least...but it works and works well.

The little stuff...often forgotten.This is the vaccumport outlet for the brake booster.

Throttle bracketry and wire.

The two wire bundles for the VEMS system.
Nope...doesn´t get any more cumbersome than that!
- Racing
- maxi Ventiler
- Beiträge: 547
- Registriert: 10. Okt 2005, 12:12
- Wohnort: Göteborg
![]() von Breity2.5-16 » 6. Mär 2007, 20:37
von Breity2.5-16 » 6. Mär 2007, 20:37
Sieht schonmal sehr geil aus Jesper

Ich freue mich schon fast so wie Maki.
Gruß Breity
Ich freue mich schon fast so wie Maki.
Gruß Breity
Mitglied im 190E-16V Club e.V.
-

Breity2.5-16 - hyper-ventilator
- Beiträge: 818
- Bilder: 3
- Registriert: 11. Mär 2006, 09:43
- Wohnort: Grevenbroich
![]() von db16v » 7. Mär 2007, 00:14
von db16v » 7. Mär 2007, 00:14
Ist das die original Drosselklappe an dem Luftsammler??
Kann man den Sammler auch für die EFI nehmen?
MFG Thomas
Kann man den Sammler auch für die EFI nehmen?
MFG Thomas
Mitglied im 190E-16V Club e.V.
Team-Moderation des w201-16v.de Forum
Mein 2,5-16 Pick up
Projekt Rennwagen
Team-Moderation des w201-16v.de Forum
Mein 2,5-16 Pick up
Projekt Rennwagen
-
db16v - Moderator
- Beiträge: 2579
- Bilder: 9
- Registriert: 16. Sep 2005, 19:58
- Wohnort: Tecklenburg
- Autos: 190E Rundstrecke, 300E Pick Up, S203 C30, 2,5-16
![]() von Racing » 10. Mär 2007, 19:34
von Racing » 10. Mär 2007, 19:34
Been at work with the "little things" last couple of days.
The build of a "kabelbaum",all the small things that come with a new intake and so forth.

This is the elementry Honeywell GT101 trigger,and yes...i simply use two common M6 bolts.Why?
Well...the trigger as well as the trigger points indeed are subjected to nature as well as surroundings,and this way IF by chance the trigger or triggerpoints ever get damaged...they´re dirt easy and cheap to replace.

A turbo engine always means various vaccum ports and what have you not.In this case i´ve opted to install them "out of glance way" seing the idea behind the setup.In other words they´re underneath the diffusor plenum so that the engine bay won´t look full of hoses asf.

Two ensure a proper seal between the base intake and the plenum part of it we use common worm clamps.
These are out of stainless steel however to go with the rest of the looks and setup.

As can be seen the "kabelbaum" per se doesn´t really "build" all that much,or is especially cumbersome in layout.
This is basically it!No more wiring needed out by the motor.

Again..on the same subject.

Although some of the original wiring still needs to be removed/cut out this shot shows that in general i opt to route the wiring per OEM specs.
No need to reinvent the wheel,and that aside it look good as well.
The build of a "kabelbaum",all the small things that come with a new intake and so forth.
This is the elementry Honeywell GT101 trigger,and yes...i simply use two common M6 bolts.Why?
Well...the trigger as well as the trigger points indeed are subjected to nature as well as surroundings,and this way IF by chance the trigger or triggerpoints ever get damaged...they´re dirt easy and cheap to replace.
A turbo engine always means various vaccum ports and what have you not.In this case i´ve opted to install them "out of glance way" seing the idea behind the setup.In other words they´re underneath the diffusor plenum so that the engine bay won´t look full of hoses asf.
Two ensure a proper seal between the base intake and the plenum part of it we use common worm clamps.
These are out of stainless steel however to go with the rest of the looks and setup.
As can be seen the "kabelbaum" per se doesn´t really "build" all that much,or is especially cumbersome in layout.
This is basically it!No more wiring needed out by the motor.
Again..on the same subject.
Although some of the original wiring still needs to be removed/cut out this shot shows that in general i opt to route the wiring per OEM specs.
No need to reinvent the wheel,and that aside it look good as well.
- Racing
- maxi Ventiler
- Beiträge: 547
- Registriert: 10. Okt 2005, 12:12
- Wohnort: Göteborg
Wer ist online?
Mitglieder in diesem Forum: 0 Mitglieder und 4 Gäste